Set up your onchain identity
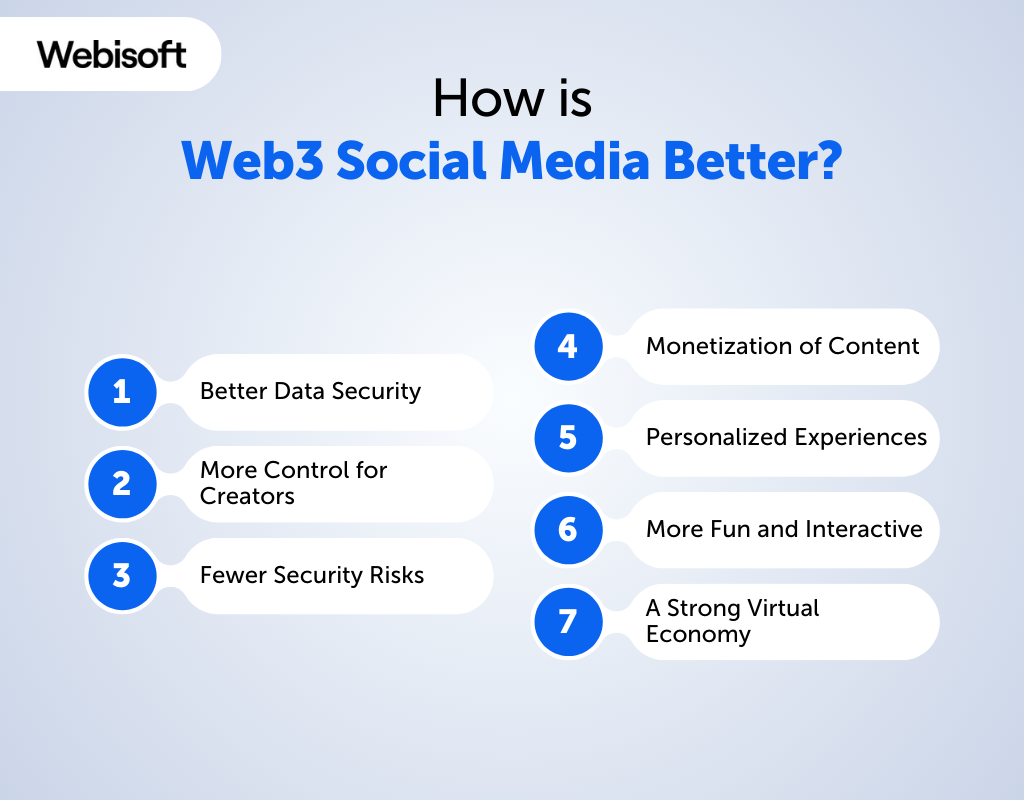
Web3 social platforms give users real control over their digital presence. Unlike traditional networks where you rent your audience, here you own your social graph, content, and reputation. To start monetizing, you need a foundation that proves you are who you say you are without relying on a centralized server. This process begins with securing a wallet and linking it to a decentralized profile.
Your wallet is your digital passport. For most new creators, a browser extension wallet like MetaMask or a mobile-first app like Base App is the easiest entry point. These tools generate a private key that only you control. When you set up the wallet, you will receive a 12 or 24-word seed phrase. Write this down on paper and store it in a safe place. If you lose it, you lose your account forever. There is no customer support to reset it.
With a wallet in hand, you need a profile that lives on the blockchain. Services like Gitcoin Passport or Lens Protocol allow you to create a decentralized social identity. This step involves connecting your wallet to the platform and verifying your identity through various methods, such as GitHub or Twitter. This creates a verifiable reputation score that follows you across different Web3 applications.
Now, link your onchain identity to your existing social presence. This ensures that your followers know this is your official account. Most platforms allow you to import your Twitter handle or Discord username. This step is crucial for establishing trust with your audience. It signals that you are not just another anonymous wallet, but a verified creator ready to engage and monetize.
To unlock monetization features like tipping, subscriptions, or NFT drops, you often need a higher level of verification. Use tools like Gitcoin Passport to gather "passports" from various trusted sources. A higher passport score proves you are a real person and not a bot. This verification is the key to accessing the financial tools that make Web3 social profitable.
By completing these steps, you have moved from being a passive user to an active owner of your digital identity. This foundation is essential for the monetization strategies we will cover next.
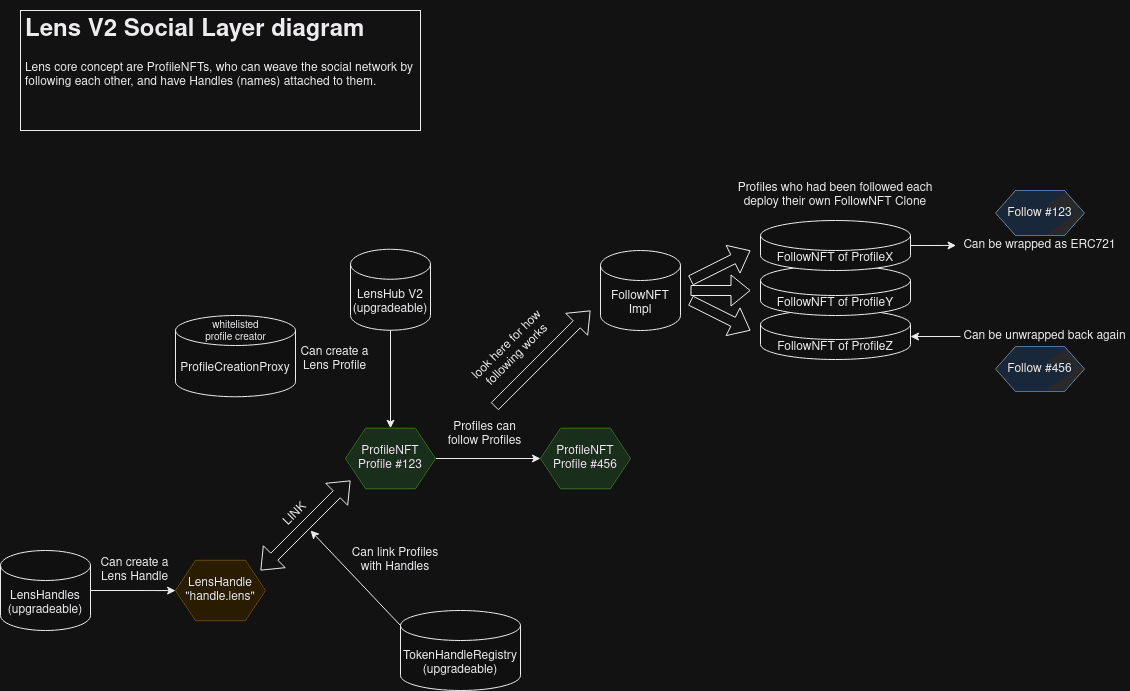
Choose the right social protocol
Selecting a Web3 social protocol is less about picking a brand and more about understanding the underlying stack. Most platforms are built on four distinct layers: hosting, social primitives, profile, and applications. The application layer is what you see—the interface for posting or messaging. The hosting and profile layers are what you own.
Think of it like building a house. The application is the interior design and furniture. The profile and hosting layers are the foundation and the deed to the land. If you want to monetize your identity, you need to choose a foundation that supports your specific goals, whether that’s direct tipping, token-gated content, or simply owning your follower list.
The following comparison breaks down the most common protocols based on user base size, monetization features, and technical complexity. This helps you decide where your time and attention will yield the best return.
| Platform | Type | Monetization | Complexity |
|---|---|---|---|
| Farcaster | Social Graph | Tips, Casts, Frames | Medium |
| Lens Protocol | Social Graph | NFTs, Tokens, Actions | High |
| Bluesky | Decentralized Fed | API-driven, Emerging | Low |
| Nostr | Protocol | Lightning, Zaps | Medium |
Farcaster offers a Twitter-like experience but with a deeper focus on onchain interactions, allowing creators to earn through tips and interactive "frames." Lens Protocol is more developer-friendly, offering robust tools for NFT-based social actions but requiring more technical know-how. Bluesky, while newer to the onchain monetization conversation, provides a familiar interface with a growing API ecosystem. Nostr stands out for its simplicity and integration with Lightning Network payments, making it ideal for micro-transactions.
Your choice should align with your audience. If your followers are already on Ethereum, Lens might offer more native tools. If they prefer quick, low-friction interactions, Farcaster or Nostr may be better starting points. Remember, the protocol is just the infrastructure; your content and community are what drive value.
Launch your first onchain post
Publishing on a decentralized social protocol feels different from hitting "Post" on Twitter or LinkedIn. Instead of sending data to a corporate server, you are broadcasting a transaction to a public blockchain. This process costs a small fee and permanently records your content in a way you control.
Think of it like mailing a letter via certified post rather than sending an email. The "certified" part is the blockchain transaction, which proves exactly when and by whom the content was created. This creates a verifiable history that no platform can erase or censor.
To get started, you need a Web3 wallet and a compatible social dApp. The following steps walk you through connecting your wallet and broadcasting your first decentralized social post.
Activate creator monetization tools
Turning followers into revenue on Web3 social platforms requires more than just posting content; it demands a functional financial infrastructure. You are building a direct economy where value flows from your audience to your wallet without intermediaries. This process involves setting up a secure digital wallet, choosing a monetization model, and deploying the necessary smart contracts or tokens.
Because this involves real money and on-chain transactions, the stakes are high. A single mistake in wallet configuration or contract deployment can lead to lost funds or security vulnerabilities. We will walk through the exact steps to set up your monetization stack, ensuring you have the technical foundation before you launch.
Start by creating a non-custodial wallet that supports the blockchain your target platform uses. MetaMask, Phantom, or Coinbase Wallet are standard choices depending on whether you are on Ethereum, Solana, or Base. Secure your seed phrase offline and never share it. This wallet will serve as your primary bank account for receiving tips, subscription fees, and token distributions.
-
Enable two-factor authentication on associated email accounts
-
Verify wallet address across all social profiles
-
Fund wallet with small amount of native gas token
Decide how you will capture value. Common models include token-gated communities (where holders access exclusive content), direct NFT sales (digital collectibles or membership passes), or subscription-based token emissions. Each model has different technical requirements. Token-gating often requires integrating with platforms like Guild or Collab.Land, while NFT sales may require minting contracts on OpenSea or Magic Eden.
If you are issuing your own token or NFT collection, you must deploy the underlying smart contract. Use audited templates from reputable sources like OpenZeppelin to minimize security risks. For simpler setups, many Web3 social apps allow you to create "points" or "reputation tokens" without writing code. Verify the contract address on a block explorer before linking it to your social profile.
Set up automated tax reporting and fiat off-ramps. Tools like Koinly or CoinTracker can help you track income from your monetization activities. Configure your wallet to automatically forward funds to a secure storage solution if you plan to hold significant value. Ensure you understand the tax implications of receiving tokens in your jurisdiction, as many tax authorities treat them as property.
Test your entire flow with a small amount of capital. Send a test token or NFT to a friend’s wallet and verify they can access your gated content or claim their asset. Once confirmed, announce your launch. Monitor the first few transactions closely to ensure gas fees are handled correctly and that your smart contract functions as intended under load.
Avoid common Web3 social pitfalls
The easiest mistake with The Web3 Social is comparing options on the most visible detail while ignoring the day-to-day constraint. A choice can look strong on paper and still fail because it is too hard to maintain, too expensive to repeat, or awkward in the actual setting. Use the same checklist for every option: fit, cost, durability, timing, upkeep, and fallback plan. That keeps the comparison practical instead of drifting into preference alone.
The simplest way to use this section is to write down the real constraint first, compare each option against it, and choose the path that still works outside ideal conditions.
No comments yet. Be the first to share your thoughts!